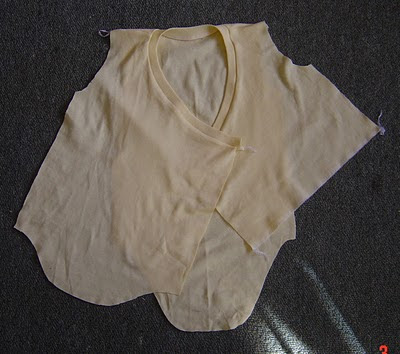
Firstly, sew the shoulder seams. This is where you'll notice if you didn't mirror your front. Go on, ask what made me stress that point during my last post ;-)
Then the neckband gets sewn on. Fold it in half along it's length, and give it a gentle press (it makes it so much easier to manage). Pin the centre of the neckband to the centre back of the neckline, matching raw edges.

Now it gets a bit more interesting. You have to pin the rest of the neckband to the neckline, but obviously, the neckband is shorter (to accommodate the shorter distance required at the outer edge of the neckline), so it needs to be stretched to fit the neckline. That's easy enough, but I don't distribute the fullness of the neckline evenly - you don't want much along the front edges, and you want to squish a lot into the tight neck curve. I sort of estimate what looks about right and put in a pin close to the top of the front, like this:

Then the fullness is distributed evenly within each of those 2 zones and the neckband is sewn on. After sewing and pressing, it looks like this:
 I often finish the lower edge of the front underlayer just by overlocking it. It isn't going to fray so could be left raw, but the overlocking helps to prevent the fabric rolling.
Next up are the side seams. Make sure you get the layers around the right way. Go ahead and ask me how I know to check that too! All three layers are sewn together.

My preference is to always set in my sleeves rather than sew them in flat, but in the interests of making my life somewhat easy I hem them before I sew the sleeve seam and set them in. If you want to sew your sleeves in flat and then finish the side seams, that will work just fine.

To flatten the sleeve seam I sew a few stitches holding it open.

Now to set in the sleeve. I personally don't find this any harder than sewing them in flat, and I think they sit much better sewn this way but that's just my preference, and I have done a lot of them so I've had a lot of practice!

See how nicely they sit? I think it gives a better, rounder shape to the underarm.

Which just leaves binding the leg opening. Join the two short ends of the binding, quarter the binding and opening and pin together at those points, with onesie and binding right sides together.

Stretch the binding to fit the curves, stretching more on concave curves, and less on convex, pin it on and sew in place. (I do this with a straight stitch on my sewing machine.)
Then wrap the binding over the seam allowances to the back, and pin in place.
I use a simple zig zag on my sewing machine to sew from the right side to anchor the binding. Since the zig zag has stretch, and is holding all the layers, the straight stitch you did earlier can pop if it wants to without in any way compromising the garment (but I've never noticed that it does). Then just carefully trim away any excess binding on the inside.


Cutie cute cute cute. Although you are seriously wreaking havoc with my recent "let's have another baby" psychosis (and it would be psychotic, trust me). And this is looking ridiculously fast and easy, of course. (And just how long does it take you to do one of those? Because it would take me about three hours, at which point I'd be sorely tempted to just go to Target - or Farmers- and buy one.)
ReplyDeleteI find this whole "domes" thing interesting. Apparently when I lived in NZ, the question of "snaps" never came up with anyone but The Husband and my MIL. I just assumed that Kiwis said the same thing that The Husband says, which is "press studs". I had enough trouble wrapping my head around that one (funny how most Britishisms are relatively easy to deal with, but then some things just don't ever sound right-- "wheelie bin", "chilly bin" and "press studs" are three I have trouble with).
English freaks.
;-) Don't you love it when caffeine-starved crazy people leave long rambling comments on your perfectly sane and pleasant posts?
it's always useful to see how others construct garments so thanks for sharing - it's such a cute little item of clothing.
ReplyDeleteThanks so much for this Judy. I am currently stuck on putting the binding on my original Otto 1/2006 version, this is next in line, hopefully, once I figure out the binding bit, but seeing you do it gives me renewed hope!
ReplyDeleteThanks again. ( I love Beangirl's rambling about Kiwispeak BTW! )