Wednesday, December 22, 2010

Wanna see the last four months of my life?

This is what four months looks like.

A 23cm (9 inch) high pile of cloth books for my twins.
I took them to our fortnightly crafty girls meet up on Monday and they all very nicely oohed and aahed and told me to blog them. So here they are. I'll make it two posts or we'll be here all day! First up, Nicholas' book.
Tie my shoe. Shoe template from here. (Other images from various craft magazine patterns for other stuff. I very seldom use craft patterns as set!)
Of course we have to learn to tell the time. I got the clock image by googling "clock colouring pages". I love google. And photoshop.


My idea, mix-up robots. The pocket holds the other pieces.

And since we gave our children long names, these pages have to be double width! The pocket with animals and letters on it holds two entire alphabets. I got a bit sick of making the letters by the time I got to letter #104! (And kept asking myself why I did this for my twins)

This is possibly Nicholas' favourite. (I made no attempt to keep these secret since the twins are only 2 1/2. When the pieces (which hold on with velcro) were done Nicholas got hold of them and wouldn't give them back. I take this as a good sign that I have not wasted four months. Images again from all over the place. The robot in the rocket is from a pattern in a Homespun magazine which I got after combining two other rocket pictures to get what I wanted. Saw this and decided to make it instead. So glad I found it before I made the other one!


What little boy (and most girls too I think) doesn't love dinosaurs? The landscape started with this and this. The cloud is from a book of stained glass quilts I think!


Hiding in pockets are these guys. Yay for google and photoshop once again! Once I had my images the right size I traced them onto press'n'seal and stitched them onto felt, which I backed with stiff interfacing and cut out. I cut a matching piece of felt for the back and sewed a bit of velcro onto it before blanket stitching the shapes together.

I'm not sure where the idea for this came from, but once the idea sparked, it was back to google for some leaves.

For these guys to hide under. They're made the same way as the dinosaurs.

And after all that work you can bet I want credit for it!


So there you go, Nicholas' book. I hope it will be loved and worn out with use (but not for years!)

Wednesday, December 1, 2010

Where'd November go?

It CAN'T be a whole month since I last blogged anything! Apparently it is. November is a pretty busy month around here anyway with two birthdays and a week of sole parenting while David was away with Georgia on her year six camp. I'm not sure who had more fun! Next time I want to go.

Just to really ramp up the busy factor I got a phone call from the secretary at Georgia and Oliver's school a couple of weeks ago, and after reassuring me that nobody was sick and in need of collection, she asked if there was any chance I could sew up a tutu for her daughter's end of year ballet performance. Apparently the costumes were supposed to be made at a sewing bee by a group of ballet Mums but this had fallen through and with two weeks to go before the performance she'd been handed a cut out tutu and told that sorry she'd have to organize it herself (!) After some fruitless phoning around anyone who looked promising in the phone book, she asked in the staffroom if any of the teachers knew anyone who could help. Which naturally led straight to me! (The secretary is actually very good friends with a friend of mine, who would also have sent her straight to me. I was destined to make this tutu.) Anyway, long story short, I made up the (very simple) tutu, and the skirt she had dumped on her with a week to go, and all was well. The phrase "saving my bacon" was uttered more than once and I got a very happy text after the performance to say that M's dresses were clearly the best on stage. (Which is really important to a teenager, and much appreciated by her Mum!)

Then the call from a friend of my sister last week to ask if I could alter a dress for her to wear this Friday. No probs - finished that today.

Oh yeah, and I'm working feverishly on the pages for the twins' activity books. Still assuming there'll be some late nights in the week before Christmas. Still loving doing them, so late nights won't be too dreadful.


Which leads me to my next big project for me. Here's what the first toile looks like on me.

Every year I cringe a bit at my 14 year old advent calendar and vow to make a new one. One day I'll get around to it. Probably for my grandkids.

The top is the corset from the Alabama Stitch Book. As soon as I saw Natalie Chanin's work I fell head over heels in love with it all - not only is everything just stunningly beautiful, but made by hand and embellished in a style into which I have dipped a toe and love doing, and want to pursue. Her books are on my list of coveted items. And there it was - on the shelf in the Dunedin Public Library. I actually said "SWEET!" out loud (in my library voice of course) as I snatched it from the shelf. We have a very good library here.

I want to make it as it is in the book - stencilled, reverse appliqued and all sewn by hand. So it aint gonna happen this summer! I have some maternity T shirts which would be perfect to refashion, but obviously at least one toile was needed to check the fit before proceeding. The measurement chart and comments led me to think that in a good stretchy fabric a small would probably be right for me.

Enter a cast off T shirt from my brother in law. Perfect for a trial run.


Only just big enough for my corset, thanks to inset panels in it's sides!

And it's great. Bring on summer 2011......

Tuesday, October 26, 2010

Getting Crafty

Well that was a longer break than I intended! Mostly because the teenager (grrrrr) used up our monthly bandwidth allowance with twelve.days.to.go. Apparently all his games had updates and it was the holidays so he wanted to play them. Nobody enjoyed twelve days of dial up internet. And since it was school holidays and I had all my offspring underfoot I didn't do as much as I'd have liked. (But I kept telling myself that if I didn't have them I wouldn't be making this fun stuff anyway. Usually through slightly gritted teeth....)

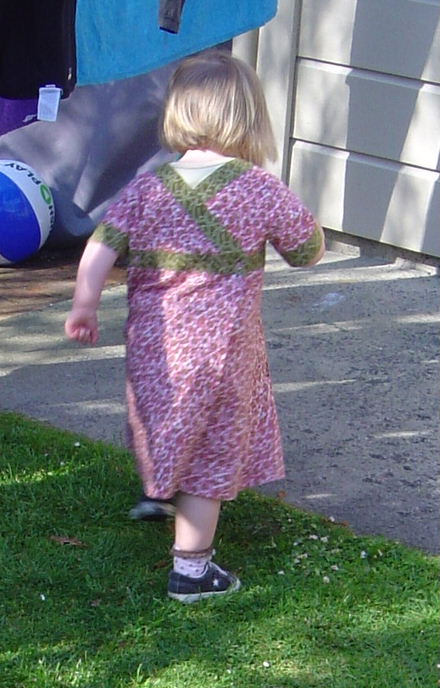
Anyway, I thought I'd start this off with pictures of Isabella in her new dress. She is a very willing model, but will do what I ask for approximately 35 milliseconds before racing off to do something else. So these are the two best shots I got.

I got a lot of these!
On the Hand Crafted Christmas front, I'm getting a slightly panicky feeling that Christmas is going to be here in five minutes and the twins' books will have a dozen started-but-not-finished pages and I will be pulling all nighters for a week and not enjoying the run up to Christmas at all. I think I need to write a list of what I'm going to do for each book. And finish each page before starting a new one. Um, not likely.

This is probably my favourite idea so far. Maybe because it's pretty much my idea.

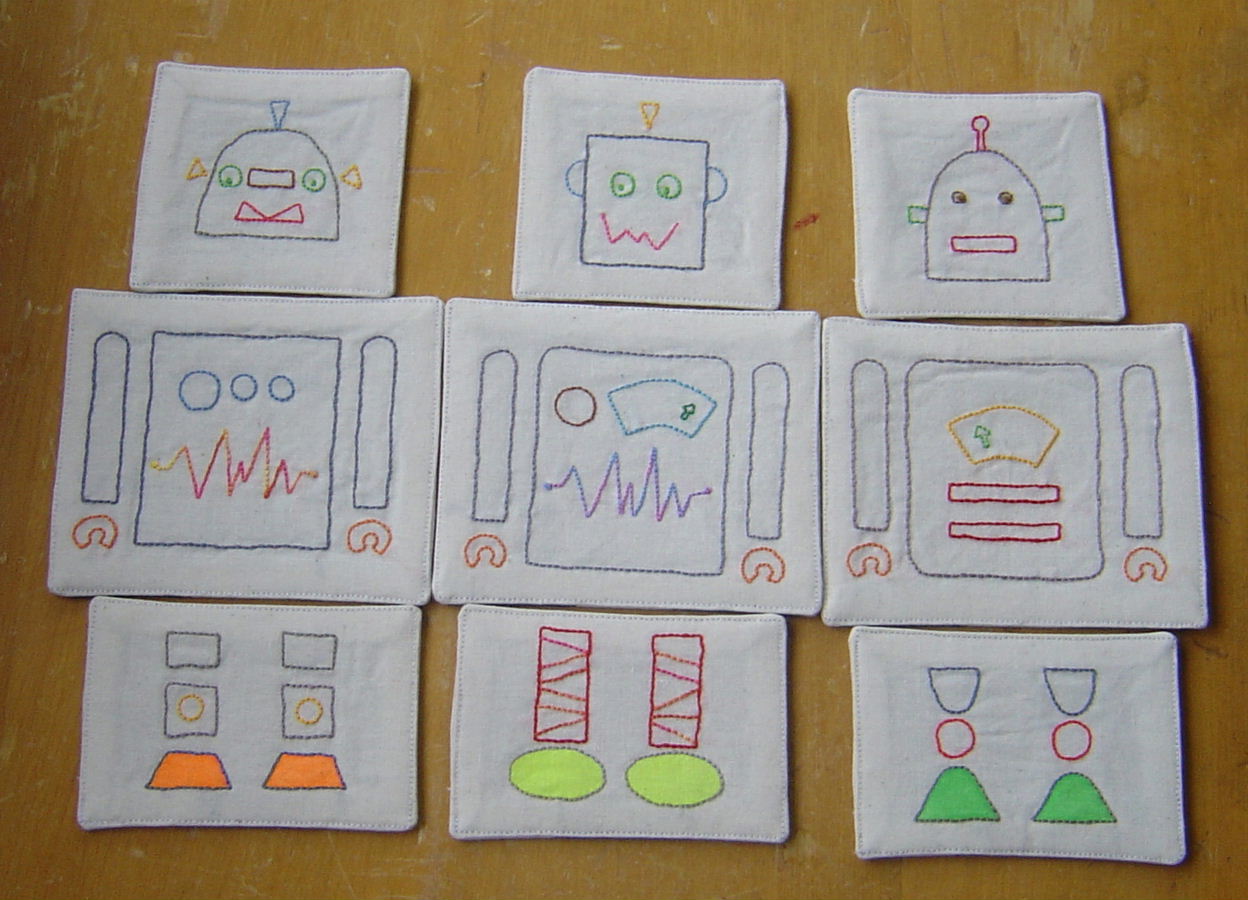
The spark of inspiration came from a book of kids quilts which featured one with those mix-up pictures - head body and legs from different characters could be mixed up. I decided robots would be fun and found a picture of cupcakes which did a similar thing (great minds and all that!) Using those for inspiration I designed my own robot stitcheries and made tags which can be interchanged to make different robots. The 9 and 10 year olds love these. We'll see what the two year old thinks!
This is how the pictures are attached. I still need to add velcro tabs to hold them in place. The plastic tags are cut from template plastic and make it very easy to thread the ribbon through the slots on the back of each tag. I think Nicholas could manage this pretty easily. Whether he puts heads at the top and legs at the bottom remains to be seen.


The options. So far. I don't think I'm finished yet.


This guy is going to be the pocket which holds the extra tags. I think I like him best. Nicholas will probably like the zip on the pocket best of all.


After the drama making one little horse finger puppet I found cute animal stitchery patterns and figured I'd do those on felt scraps and cut around them. The designs are drawn onto press'n'seal which is pulled out aferwards. To support the felt while I stitched I sewed the felt scrap onto a fabric scrap like this.


And cut (very carefully) a window behind the felt.

As you see I stitched onto my backing fabric a bit, but after stitching I just cut the backing very close to the stitching and pulled it out.


And way down here at the bottom are juggling balls made for Georgia and Oliver. Named in case they forget who they are. (In my experience kids love things with their names on)


Sitting on my latest score from the library. Yes that's the Betty Kirke Vionnet book. Turns out the library had two copies - one for issue, one not. Oh the eye candy in that book!
Now to delete the photo from computer and camera before Georgia sees it - she saw her pincushion on the camera, but since the screen is quite small she didn't see the details and I sort of dismissed it as "something that didn't work". She may have fallen for that!

Thursday, September 30, 2010

Someone else's pattern - what a novel idea!

I have been known to wryly comment that poor Isabella is going to spend her life dressed in prototypes. The best way for me to trial a new design is to make it to be worn. And when I have a small model living in my house (who is too small to complain that she is not paid for this) I take full advantage and she test wears many of my designs.

The downside to this is that I seem to be constantly having to make things up as I go along - sometimes it would be nice to just open a pattern and make it. One where someone else has worked out the kinks and written instructions so that I don't have to think!

Enter My New Pinafore. A delightful pattern designed by Karen Davis and sold through http://www.patchworkpassion.co.nz/ If you go to their patterns page and scroll down you can see it, but apparently you have to email them to buy it. (I got it from the Craft and Quilt Fair in Christchurch.)

Here it is in a size three for Isabella. A pretty, simple pinafore.

The pattern for which I probably wouldn't have bought had there not been a beautifully made sample right there which I unbuttoned to find a very clever opening. I love clever, elegant design solutions so I just had to make this!

The instructions for this were fantastic - clear and thorough. Gotta love instructions which tell you to press - repeatedly. I didn't line the skirt which simplified it a bit. Isabella is currently napping and today is grey and cold so I have yet to photograph this on her. Once I do I'll do a proper review on Patternreview. Short version - Good pattern. Worth buying.


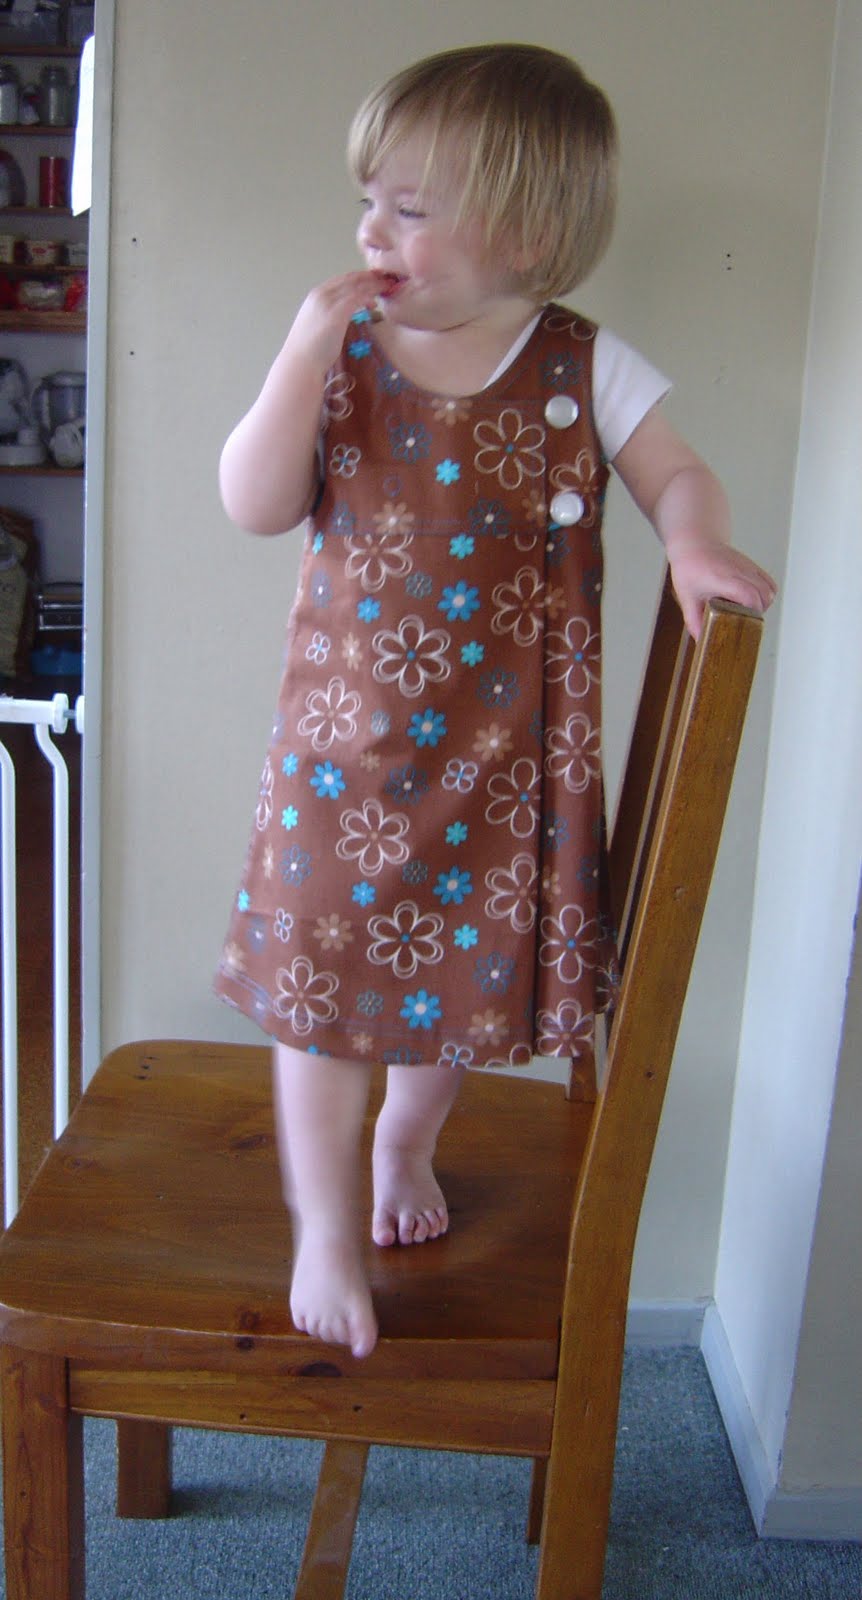
Edited to add a photo of Isabella most willingly modelling her new dress. I ask her if she wants to try on a new dress and she starts jumping up and down and trying to rip off whatever she is already wearing. Once in the new dress she immediately climbs onto the chair placed for her photo. When she's older she might start asking for her modelling fees to be direct paid into her bank account, but at the moment we get by with cuddles.
This is a size three on 2y4m Isabella. The fit is described as "very easy" and it fits my chubby little girl perfectly - not too tight or baggy.

Tuesday, September 28, 2010

So Spring already!

Well ok the past couple of days have been lovely - I wore my new Vionnet dress yesterday and felt a million bucks in it! David concurred ;-)

In a desperate attempt to force the weather to play nice, I made these two dresses for Isabella.
(Although Keely and I are convinced that as soon as she starts thinking about making a warm coat the weather warms up. Start thinking Keely!)

The one above is made from the softest cotton (?) sateen which has been mellowing in the stash for ages since I bought it as a remnant. There wasn't enough to make anything floaty for me or Georgia, so it waited till I had Isabella. Then it popped up and politely requested that I make it into a summery dress for her. Done.

The one below is the result of several design ideas I've had floating around for a while, most notably back wrapped styles and external facings. I saw something somewhere which smacked me in the face and those disparate ideas coalesced and this was the result. The fabrics are quilting cottons from Spotlight, which I found in their remnant bin on Sunday. There was just enough of the pink, if I cut the bodice upside down and put a seam in the bodice at CF. I'm not sure how they'll stand up to wear, but I'm keen to find out. And they cost only $5.40 so I won't be heartbroken if this dress doesn't wear terribly well. The joy of drafting my own patterns is that I can repeat a design any time I like, with alterations as I choose.

The bird stencil is one I got from a library book. (It took aaaaaaaaages to cut from freezer paper, so I was really careful peeling it off to see if it can be reused. I've never heard that stencils can be reused, but I have heard that when used for patterns for quilting and such, freezer paper can be readhered.) I dropped the paintbrush while I was doing it, and there's a small smudge to the left of the image. Can you see it? I was careful not to go near it with the iron while I was heat setting, so it may wash out over time. Too bad if it doesn't!


In the mean time, not a lot else creative has been happening, often because of this guy. This is why we have a kiddie proof gate across our kitchen. (He's not allowed in at all if the oven is on!)


Totally unrehearsed or coached - he just watches us and when allowed in for a snack, copies. The boy is T.R.O.U.B.L.E.
Maybe this would help?


Would you believe that this was his idea as well?

Tuesday, September 14, 2010

I really love my kids..

....or else I wouldn't be doing this! I have decided that this year I will make as many of my childrens' christmas gifts as possible. I would love their stockings, handmade by me for each of them as they were born (well, the year they were born, not the actual moment) to be full of handmade goodies which they will love and cherish and play with for years. I've been working all their lives on indoctrinating them into believing that handmade is more precious than shop-bought. (It worked with me, thanks Mum and Dad!) I make people stuff as a tangible way to show that I love them. Georgia is well and truly brainwashed, hehehe. I have months. Should be plenty of time.....

Exhibit "A", the beginnings of cloth books for the twins. In my usual fashion I have begun each page as I've thought of it, with the intention of finishing them as I figure out how I'm going to do that! Some applique, some stencilling, some stitchery. Whatever I feel like. I'm desperately hoping that I won't need to resort to glue - my dear friend J (the glue queen) would never let me hear the end of it. I am pretty condescending about glue. So condescending that I don't actually own any glue of any kind.

The barn was taken from here, very slightly modified, and contains this guy. I am rather proud of him because I designed him myself. (I don't know how I am so sure he's a him. I just am) I used a much-too-big applique design as a guide for the face and made up the rest. He is being modelled by a purple clothes peg and duplo building plate because I could not hold my hand still to model him myself!

Exhibit "B"


Back.
I cut him out and sewed him up during the smallest crafty girls evening ever (just me and M - everyone else was busy this week!). M was highly amused by his "hands". Haven't you ever seen a horse waving his hands in the air? Anyway, I like him, wonky as he is. And he (and a buddy or two I have yet to make) are for two year olds. They are unlikely to be critical. And yes I know he's too big for a two year old. There was no way I was sewing (or cutting, that was harder!) anything smaller than this. I'll pretend that it's deliberate so that Mummy can join in with the play. They should fall for that. Once he was made and I tried him in the barn I realised that he is also too tall to be hidden by the doors when they're closed. Oops, too bad!

And tucked down here at the bottom where I hope Georgia doesn't see it, is this wrist pincushion for her.
Exhibit "C"
The stitchery is actually symmetrical, but extends over the sides a bit, so he looks wonky. I got the idea from here, but drew my guy myself. I just picked a christmas issue of a craft magazine (probably Homespun) and found a gingerbread man outline which was the right size and drew on the details. The pincushion is my own design and has a casing sewn onto the base so that the elastic can be easily replaced when it wears out. Georgia will love it, but she's been bugging me to make her a wrist pin cushion for a while and I'm not sure how well I can put her off till christmas. I'm famous for procrastinating, so I'll give it a shot!

If anyone's interested I'll post my progress on my Handmade Christmas. (Yay for Kirstie's Homemade Christmas for being one [of many] to inspire me!)

I may just aquire some supplies on our Crafty Girls road trip this weekend. Five of us are going to the Craft and Quilt Fair. In Christchurch. Yeah. We've been planning it for months. It's my first break since I had the twins. (I don't count the two days I spent hospitalized with pneumonia getting iv antibiotics in January, or the many days either side of them when I was too sick to do anything other than lie on the sofa while David just got on with taking care of everybody.) According to the fair website and our accommodation website both are operating business as usual. Earthquakes be damned - I WANT MY CRAFTY GIRLS ROAD TRIP! (And I'm sure the Christchurch economy could use the income).

Thursday, September 2, 2010

Vionnet dress - finished!

I don't like how I look in these photos, (when do I ever?) but I'm so pleased with the dress that I couldn't wait to show it off and couldn't wait for David to get home and take nice pictures (he makes me smile) and wanted to show it on me rather than the dummy - you get a much better idea of how it looks in real life. (Phew - need a breath after that sentence).

So here we go - angled view of the front:
And the back:

These shoes are not what I would likely wear with this dress, but they were the first heels I grabbed when getting organized to take the photos. And despite appearances to the contrary I am quite vain enough to want to make my legs look the best that I can. Which means heels.

I'm not wearing sucky-in undergarments (great suggestion Ann) because I don't own any. I've always worked on the theory that anything requiring such things was going to be too much work to wear! I may revisit this opinion, but this doesn't look too bad. I have several convertible bras which are ideal - just cross the straps at the back and we're good to go.

The hem I ended up just cutting. To stop the overlocked seams unravelling I would normally just stitch over the end, but given my sewing machine's dislike for this I decided to deal with the ends by threading them back through the seam. To have an end to thread after cutting the hem I left the seamlines uncut when I cut the hem, then unpicked the overlocking on the dangling seamlines, cut off the excess fabric, knotted the threads and threaded them through the seam.

My parents visited yesterday and were fascinated by the dress - especially my Dad, who is a retired structural engineer. He had a great appreciation for the dress' evolution from scaled schematic (with no indication given of what scale!) to dress. It is from him that I inherited my love of this sort of problem solving.


Now of course I want to WEAR it! Spring sprang yesterday with a gloriously bright sunny day so today is of course grey and overcast.
I'm not sure what's next. I have a large stack of possiblities from the Kirke book, or approximately seven kersquillion (yeah it is so a number!) other dresses that I'd like to make. With the twins weaned just after they turned two I will never breastfeed again (sad and not sad about that) so I can wear dresses whenever I want.


I'm linking to No Big Dill's sewing month challenge - to do something new. When I first read about it I struggled to think of something I hadn't done before - wedding dress(es)? yes. Design and pattern making? yes. Canvas boat cover (with clear plastic zipped door)? yes. Menswear? yes. Historical costumes? yes. Velvet, silk, wool, lace etc etc? yes. Then I realised that I have never made a dress for myself to wear from a pattern schematic of a design by Madeleine Vionnet (one of my design idols). So there's my first!

Friday, August 27, 2010

Vionnet dress - almost there

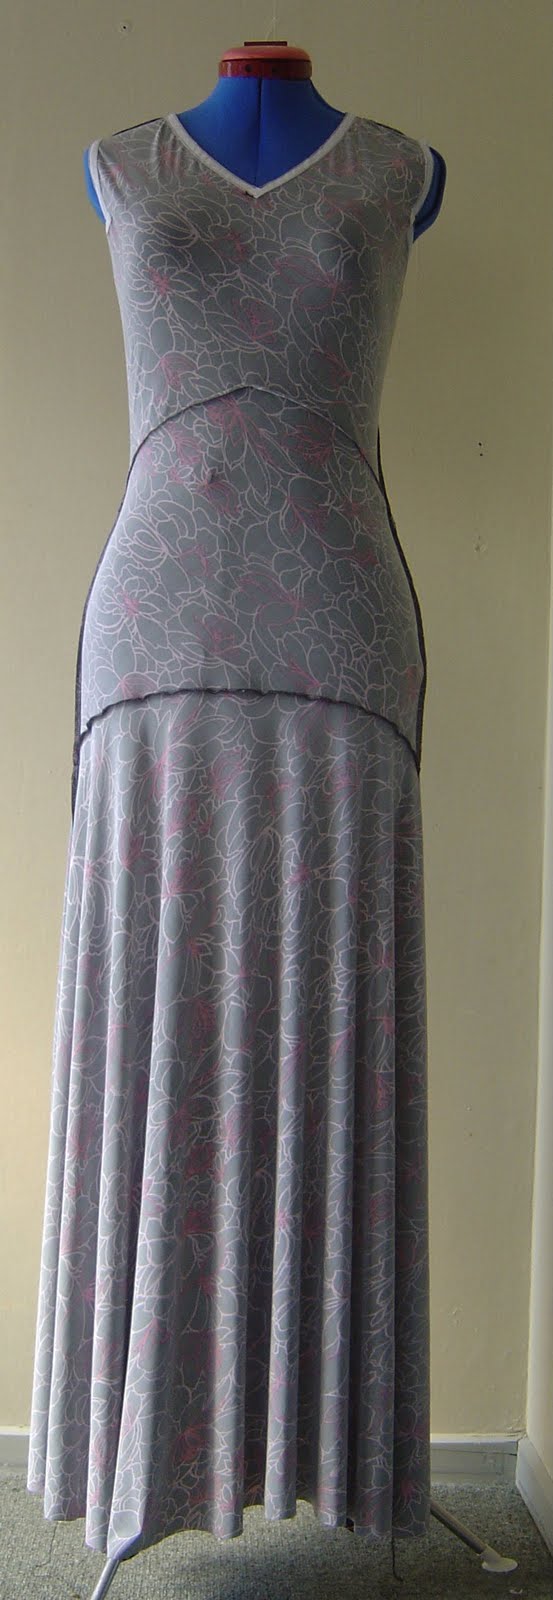
I had this dress cut out and sitting in a bag on my desk for quite a while because when I sewed the waist dart on the front I realised that this is one of those fabrics which my sewing machine haaaaaaaaaaates. It has a rubbery feel to the stretch and is what I call pin resistant - it's hard to push a pin through. The overlocker loves it, and it is heavy and drapey - perfect for a dress of this style, so I was going to persevere. Unfortunately the busy print pretty much renders the interesting seaming invisible. Fortunately it hides the hole I cut right at the CF when I trimmed away the excess facing strips from the neckline. (Yes I swore as I sewed it up.)

Oh, and it clings to every little bump. The bumps you can see on the hip are the adjusting knobs on the dummy. I don't have adjusting knobs, but I do have my own collection of bumps.

Inside out you can see much better how it's put together.


I love how it falls in such perfect graceful folds. I really don't love how hard it was to finish the neck and armholes. My first plan was to use a self facing. My attempts to sew this using my machine looked terrible, even with a brand new stretch needle and a walking foot, even using my usually fool proof press'n'seal stabilizer method. I tried using a narrow three thread overlock, but that lettuced out (first time in 20 years I wished my machine had a differential feed). Hand rolling (on a sample) also looked awful. Lying in bed stewing over it and describing my problems (at length and in detail) to my long suffering husband made me feel better but didn't produce an answer. Stewing about it some more after he went to sleep (sensible man) made me wonder if bias strips of a woven fabric would work as facings. Vionnet used on grain strips of self fabric to do this, but with my very stretchy fabric I thought bias would be better. And what do you know - perfect solution. The woven fabric stopped all the skipped stitches and finishes the edges perfectly. I still need to press the edges, but trust me, they sit very nicely against me.


So this is going to be a wearable dress. I'm going to leave it on the dummy for a couple of days to let the bias hang (yeah, I cut this very stretchy knit with a fantastic degree of recovery on the bias. Just for the hell of it), but I don't expect a whole lot of change. I'm thinking of hemming it longer to make the most of the swishy skirt. My first plan was just below the knee, but I think maybe longer would be better. Next problem - how the h*** am I going to sew the hem?

Tuesday, August 24, 2010

Cold feet

I don't like having cold feet. So with only one week left of winter I finally decided to do something about it. And I really wanted to get rid of the photo of my butt which greeted me every time I looked at my blog. (Amazing what will motivate me sometimes - my visits to the gym are sometimes motivated by a desire to get exercise, sometimes by the thought of the shower afterwards and sometimes by the desire to not be the parent on duty. Whatever works!) So I figured that if I made some slippers I could post them here and get the butt photo off the top.

This is why I needed slippers. All winter I've been wearing these because I find most women's slippers ugly beyond belief. (Yeah, while these are stunning!)


So about half an hour's work and some lovely thick polar fleece (scraps from a manufacturer's clearance many years ago) and now I have these.

Rough prototype, but warm and comfy. The final product will be neater, probably lined, and I'll bind the top edge to help them stay put, and think about what the soles will be so that I don't slip on my kitchen floor. Knowing me I'll wear these ones to shreds and then make up the "proper" neat ones. In about two years.

Thursday, August 5, 2010

Vionnet toile #2 on me

Between a temperamental computer and blogger being picky I figured that rather than edit my last post to add these photos I'd just post again.

So here it is on me, now with seam allowances around the armholes cut away as well so this is the current toile's finished size. (And not only is my hair brushed, but I've also run the straighteners over it. Not for blogging pride I'm ashamed to admit, but because we're going to Georgia's intended Intermediate School's open night this evening. Out in public=tidy hair)


I am really really pleased with how it's looking. The "bubbling" of excess fabric over my hips and odd fall of the back skirt's side seams below this are almost certainly due to the uneven match of seams between waist and hip. Just to check I'll probably adjust this toile and press the seams. As it is it makes my butt look huuuuuuge. (So we all know it'll be fixed in the final garment!)
It isn't perfectly flat across my lower back, but a more drapey or stretchy fabric may address this. I still can't get over the fact that such a fitted dress fits over my head with no opening. What a perfect dress.
Any suggestions/opinions very welcome.

Vionnet toile #2

Ta DAAAAAAA!
Front:
Back:
A couple of quick notes - I've cut away the seam allowances on the neckline, so this is the finished neck size, but I haven't trimmed away the armholes, so they will be 2.5cm smaller. The skirt is just portions of the total, cut on the correct grain, incorporating all of the seams but not all of the length, to save fabric and time. (I actually quite like it!) And it isn't pressed at all.
I can't believe it only took two toiles to get it to fit! (It helps that I'm not wildly different in size to the original wearer.) I was so eager to get the alterations done that I forgot to photograph how I added in the extra. I'll explain as best I can.
By measuring the sewn-up toile #1 I worked out that I had to add about 8cm to bust and waist. This is a very managable figure - 2cm each at CF, CB and side seams. Pretty straightforward - on a traditional pattern with side seams. I established where the sides were on my toile and marked that on the front pattern piece. Then I drew a line perpendicular to the CF onto the piece, making sure it went through the sticking out bit which contained the sides. I traced the stitcking out bit and slid the tracing 2cm along the perpendicular line, then blended the lines back to the original at the armhole and to an added 1.5cm along the hip bit I'd added to be safe, I figured I could always take it out) I just added 2cm to the CF. It'll lower the neckline, but since it's quite high that won't be a problem. To the back I added 2cm to the CB by tracing the original toile right down to where it curves in at the bottom. There I pivoted so that the original lowest point (at the CB) was on the new moved CB line. That just meant that I hadn't changed the length of this section and wouldn't need to alter the corresponding skirt piece. It's such a small amount I've changed the angle that I'm not worried that it'll affect the drape of the skirt hanging from that seam in any noticable way. I didn't have to touch the back skirt pieces, and the front skirt is a simple quarter circle with a right angled triangle cut off the top. Since I'd altered the section to be joined to the front skirt I worked out how much to cut off by measuring the lower bodice edge and applying pythagoras. I wish my kids had been around at the time so that I could have lectured them sanctimoniously on how useful mathematical theory is in the real world.
A bit of feverish haste to sew and slip it over the dummy and it FIT! Just like that! So I tried it on me. To my complete and utter astonishment, it fit me too! Now this is a relatively fitted dress with no fastenings - the stretchy nature of bias is what enables you to get it on and off. M Vionnet was one very clever lady. It's tight across the bust but otherwise damn near perfect. I was twisting and turning to see the back in a tiny wall mounted mirror but David said that when I stood still the back was perfectly flat. So I drafted and cut out sections of the skirt, just to get a feel for how it looks all together. There is only one area that needs tweaking, where I've altered the length of one bodice section and need to compensate on the skirt. You can see on the front that the lowest portion of the bodice is a bit puffy. Easy fix! I tried it on when I'd attached the skirt and couldn't believe how well it fits on only toile #2. I'll try a self-timer shot on me when the twins go to bed.


So that's whereI'm at. So very nearly there, with way fewer headaches than anticipated. I'm inclined to think that I've learned all I'm going to from the lining toiles, and since fabric choice is crucial it's not worth doing any further testing and tweaking till I know what I'm going to use. I have about 8m of a knit I got because if you bought the whole roll you got it for next to nothing. Curiosity might drive me to try a toile in that, just to see how it works. Who am I kidding? Expect toile #3 in a knit next!
I'm having so much fun with this project! I was browsing some of my historical reference books the other night, including this beautiful two volume set of drool inducing eye candy. And there in Vol II, p460 is my dress! In black silk. I wish they'd included a picture of the back, but at least it's a picture. Also I hit Google to see if I could get any help with the project and found this article from Threads written by Betty Kirke herself. She explains how she measured the garments to produce the patterns - fascinating!
And Sherry I had to laugh when you commented that you were suddenly bored with your project and wanted to spend an afternoon here - that was pretty much my reaction when I saw the wedding dress you posted - I'd love to spend an afternoon exploring your stuff! (And watching you do bound buttonholes. That'd be good too.)
Edited to add - Arrgh!!!! Blogger won't let me break up my text into paragraphs! Sorry, this is a massive chunk of unbroken text to read. What's their problem with spaces anyway?

Tuesday, August 3, 2010

Vionnet toile #1

And so it begins....

I made up just the top portion of the Vionnet dress to see how I'm going scale wise. It's cut on the correct (bias, naturally) grain, of lining. And when I tried to slip it onto my dummy it was immediately obvious that it wasn't going to fit. After ripping out the "side" seams I slipped it on and had a look.

You can just make out my stitching lines in white (I marked those with dressmakers carbon before I took the paper pattern pieces off). I didn't pin it terribly evenly so one side gapes more than the other.


It's close enough that I think my scaling is pretty close - it's just a tiny dress! It's also meant to be made from very drapey satin, which would make it looser than my lining.
So, my next problem is how and how much to scale up? My first thought is that with complex and unconventional seaming it would be easier to just enlarge the whole thing by using a larger scale than by any type of grading technique. The problem with that is that it'll make the bodice longer as well as wider, which obviously wouldn't work. So I'm going to do some measuring to see how much extra width I need and see if I can add that in without ruining the lines of the dress. I can sneak a bit in at CF and CB, the rest is going to take some careful thought. The skirt is so full that I feel I can ignore it at this point. It's also so simple that it can be easily adjusted to match anything I do to the bodice without compromising the cut. And Sherry, yes it is slashed at the CB to match the point of the bodice CB. Can't wait to see how that looks!

Monday, August 2, 2010

Up Next

So I went to the library yesterday, and whilst browsing the shelves I spotted the famous Vionnet book by Betty Kirke. I've wanted this book ever since I knew it existed, but as is always the way, cost is prohibitive. So to see it sitting on my library shelves seriously made my heart start to flutter! Sadly it had a "Not For Issue" sticker on the front cover, but it did not have a "Do Not Pick Three Garment Schematics To Photocopy" sticker, so I raced away to the photocopier and cleared out the change in my wallet, grateful that (most unusually) I had change in my wallet! I photocopied the sketch and pattern schematics for three designs, with plans to go back and have a proper look at the book when I don't have Georgia downstairs picking her own books and wondering what Mum's doing upstairs for so long!

I seem to be suffering a serious case of winter blahs this year and I've decided that a Vionnet dress is the perfect antidote. Even recreating the pattern presents all sorts of challenges. Just what my brain needs.

I remembered a post on Kathleen Fassanella's blog, Fashion Incubator, about the Kirke book and a Japanese companion book which is better for reproducing the patterns. So I knew before I even saw the Kirke book that there are likely to be some challenges turning the pattern schematics into patterns. For my own entertainment I'm going to blog this process, and maybe I'll learn something of use to others who want to do the same thing!

I'm going to start with this dress, pattern #14. Isn't it beautiful? I'll shorten the skirt and I'd like to make it from something I can wear as an every day summer dress, but I'll see where the pattern leads me.

First problem - there is no scale indicated to enlarge the pattterns. Crap. (I did know this beforehand) There are no landmarks such as "waist" helpfully marked to help gauge scale. I made a fairly educated guess that it was 1-10 scale, based on estimating where the waist would fall on the pattern, and working out that the back neck to waist measurement was about 4cm, and the measurement on a person is about 40cm. Very dodgy estimation, but I would guess that it would be a round number scale - not 1-12.34 for example. After I'd decided this I found a message board thread (which I didn't mark, annoyingly, so I can't find it again!) in which someone mentioned using a 1-10 scale for these patterns. She didn't say it hadn't worked, so I'm going to stick with it.

So now I needed to scale up with no grid. It was actually quite easy to transfer the schematics to a grid - I just traced them onto a 5mm grid torn from an old maths book. Then I took a large sheet of paper and folded it into a 5cm grid to get my 1-10 scale. I folded rather than drew because it was less prone to errors (as a pencil blunts the lead gets thicker, and further from the ruler etc etc). Also I then have my grid visible on both sides of the paper and I can rub things out without losing the grid.

Not my favourite method to reproduce something, but with great care and careful measuring (I think I used every measuring tool I own) I could recreate the pattern pieces.


Traced onto plain paper and with 2.5cm seam allowances added, here's the result of about 2 hours work today.

At this point I ground to a halt because my dummy and the fabric I'm going to try first are in the bedroom where the twins are napping. For my first toile I'm going to use lining because it's lightweight and I have a lot of it. I know it's not nearly drapey enough, but it should give me an idea of how it's going size wise. Tomorrow.....