Wednesday, May 23, 2012
Dress for Isabella.
A few polka dots in two different sizes stencilled on with freezer paper (thanks J for the circle punches!)
And I ended up with this. Because little girls who are turning four tomorrow NEED a new dress. I think it's a rule. (Little boys who are turning four tomorrow don't need a new shirt because they have yet to outgrow or wear out the new one Mum made last year!)
Piped peter pan collar and petal sleeves in a red I chanced upon in a remnant bin which matches my paint really well. The original front button and buttonhole bands are now at the back. I did have to add a little yoke to make up length.
And some inseam pockets inspired directly by this dress on Pinterest.
I decided to photograph the dress today because when we get home from kindy tomorrow it will probably be covered in mud, paint or food. Or all three. Which is as it should be when you are four.
Thursday, July 8, 2010
My Creative Space - Um, Bandwagon, room for one more?
So here's my version, for which I won't provide a tutorial because there are about 70,000 results from Google if you look. Besides which I don't do the "lay a dress which fits your toddler on top of the dress and cut around it" style of sewing. I'm a pattern maker. Not a proper one (a patternmaker, with no space between the words), but I learnt the principles as part of my degree and continue to learn all I can from books and the internet (check out Sherry's blog for some brilliant tutorials). I drafted a pattern for an A line dress in a size three (so it should fit Isabella better this summer, when she'll be over 2 and a half) and made this.


To maximize available fabric I unpicked the (flat-felled) side seams.

And squeezed my pattern pieces on. I had to unpick a bit of the armhole seam as well to get it to fit.

Here's a reminder of how I manage my turn of cloth allowance for collars. Sherry shows how to do it properly at the pattern stage. I've folded the collar and pinned the lower edge and now I'm sewing within the seam allowance to secure it before attaching it to the neckline. You can just see how the underneath layer is peeking out.

Also on my desk today are these trees, freezer paper stencilled. I really really really love silhouettes of bare trees.

And my friends have been giving me stick for not mentioning my dress. I wore it out to dinner for one friend's birthday last weekend. Where it was much admired and I felt a million bucks. (I even ran into my BIL who told me I looked fantastic.) I realised that it wasn't the dress that left me feeling Meh, it was the grey and dismal winter we've been having! So Keely, J, M, H and other J, there you go. I mentioned it.
Thursday, June 17, 2010
My Creative Space - dress interrupted
As much as I want to finish my dress, it's taking a backseat this week so I can make a top for a dear friend to whom I owe sewing in return for babysitting during the school holidays before I had the twins. Um, yeah, she's patient! (actually she waits till she wants something then cashes in a favour). Even if I didn't owe her sewing I'd want to do it because she's a) lovely, and b) a real pay-it-forward kind of person. She truly deserves a bit of pretty coming her way. Anyway, she's just undergone surgery and (as you do) needs a pretty new top. This is one that we copied for her from a RTW top a couple of years ago. By "we" I mean "me-while-she-sat-beside-me-saying-"uh huh"-at-relevant-points-and-feeding-me-Pinky-bars." I got started on it yesterday and quickly decided that it needed to be prettified. J and I have very similar taste so I am a little more confident that she will like something I like than other friends would.
My first idea was to do a very simple applique using a running stitch around a stencil design then cutting away the excess fabric, a technique very similar to what I've done on my children's designs with an influence from the utterly stunning work of Natalie Chanin (if you've never heard of her, go and check out Alabama Chanin). After I'd done the first one I was not convinced. Here's the best photo I could get of the front of the top with one applique done and two others pinned in place.
I just wasn't feeling it, so I decided to paint a couple and see if they look better. Since they're on scraps of fabric there's no risk of wrecking J's top if it doesn't work or she doesn't like it. Two silver and one burnt umber, on two different coloured fabrics. Now to watch the paint dry......

.......and they'll look a little like this. Once the paint is properly dry and heat set I'll figure out how best to attach them to the top. I'm thinking of going back to the running stitch (with toning but slightly contrasting thread) and trim method.

And just to finish I thought I'd show what happens when you forget to cover (or lower, if that's an option) the feed dogs on your sewing machine as stated in the instructions before using your new favourite toy, the Greist buttonholer. I was trying to go around each buttonhole twice and the second one wasn't lining up with the first. After four keyholes and one short buttonhole (and several heart palpitations) I realised my mistake and covered the feed dogs. After which I got a beautiful short buttonhole and the most Perfect Keyhole Ever. I am so in love with this. I need to make myself a(nother) coat just so I can USE it! And many thanks to Katie, who had the great, simple (and blindingly obvious to anyone other than me) idea of starting the buttonhole at a point other than the top with my other buttonholer - worked a treat!
Thursday, April 22, 2010
My Creative Space - Why buy what you can make better?
My creative space has been busy for the last few days, working on a few different projects, depending on whether or not the twins are around. Lately I've been trying to get sewing done while they're not napping, so they get used to it going on in the background and don't feel the need to investigate what I'm doing in up-close detail! Um, yeah, this might take a while.
So anyway, project #1 was a singlet (vest, undershirt, onesie) for Isabella, who is about to outgrow the ones she's wearing now. I bought a couple on sale in Farmers and wasn't happy with either of them really. I didn't like one because I don't personally like the envelope neck style - great principle, but they never seem to sit well because the wrap over bit isn't big enough so they take fiddling . I'm NOT a fan of fussing with clothing on wriggly toddlers! The other was annoying because it's a wrap over style (so far so good) but it has too many domes. (See previous comment about fussing and wriggly children). So with two not-very-satisfactory singlets I wondered why I didn't just MAKE her some - I'd adapted an Ottobre pattern for Nicholas some time ago and it works really well, so I just needed to do the same thing for her size and get to it. (For the record it's Ottobre 01/06, #4)
First I needed a complete pattern for the front. Trace one, flip the paper and trace again...


I drew my new style lines on the complete pattern. The outer neckline is there so I can measure it to see how long to cut my neckband. The inner neckline is the new seamline. The two horizontal lines are where to cut the under layer and it's hem fold line.

Then Nicholas did this....

Yup - tore it! By very lucky chance he only ripped the bit I was discarding anyway, but still! At this point I gave up till nap time.
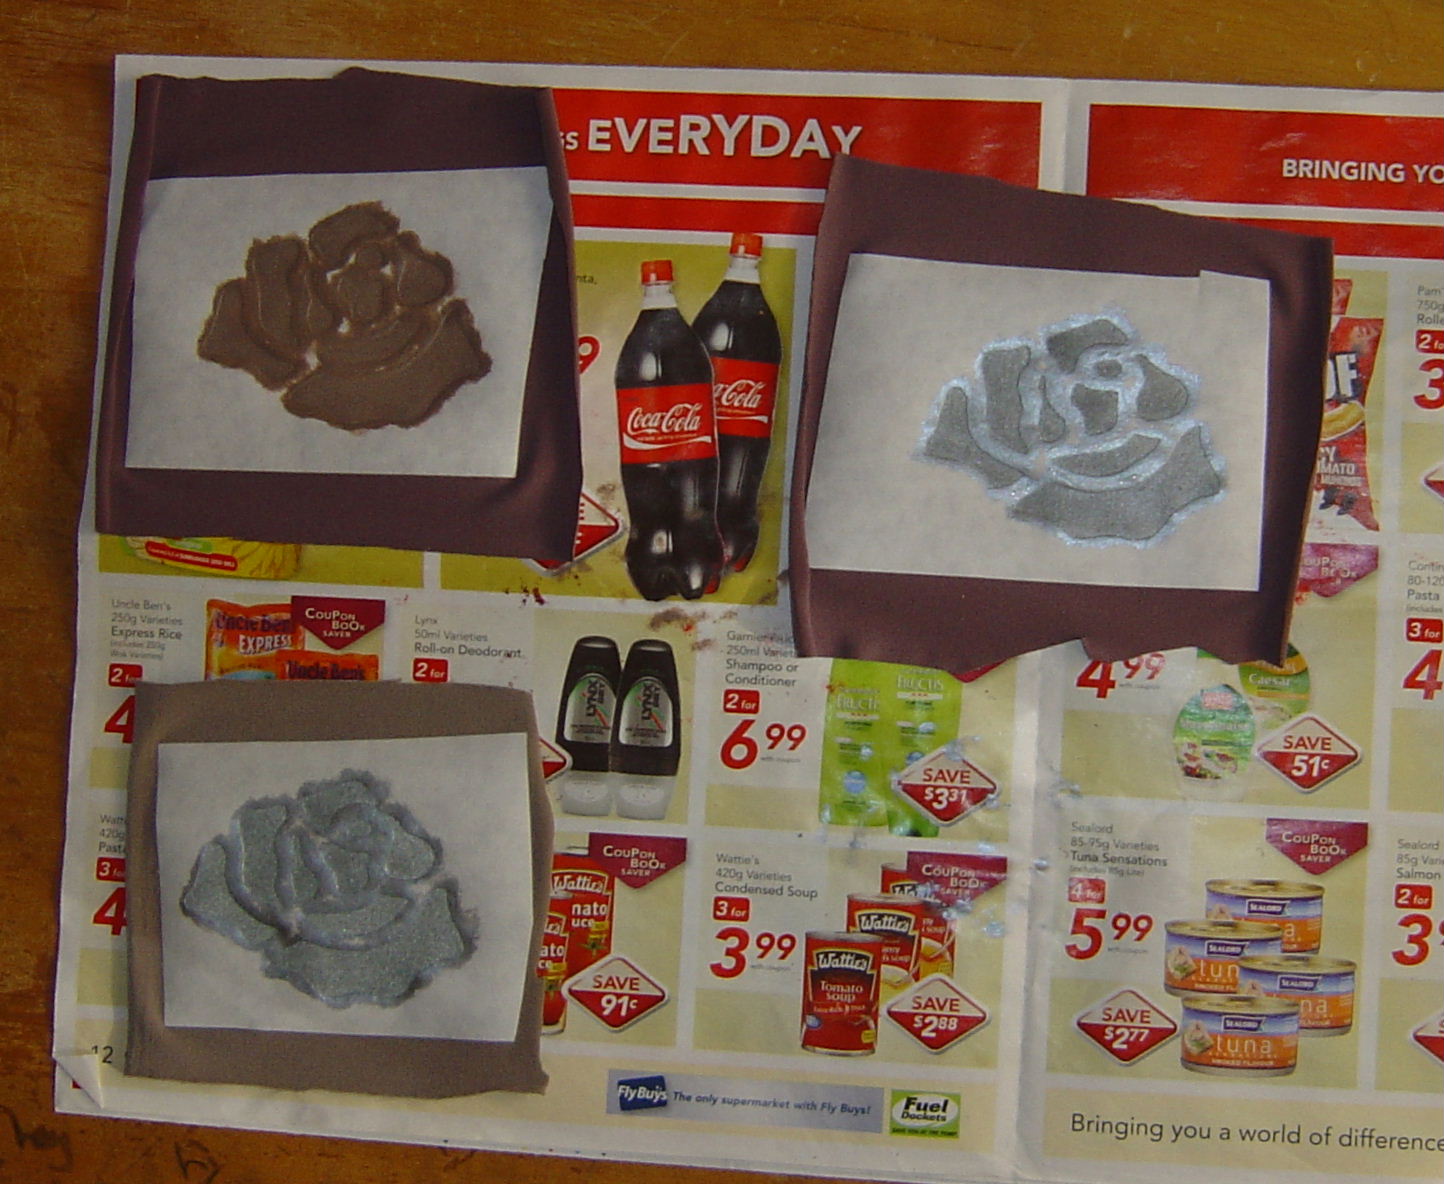
Then I cut a bunch of leaves from freezer paper with a craft punch - how quick and easy is that compared to laboriously cutting each stencil with a knife?! Iron them on in what I thought was a pleasing pattern...

Have at it with textile paint, and there you have it. A front and two backs lying on the floor to dry. Slight panic while I figure out where I'm going to put them when the twins wake up...

When the paint was dry and I'd peeled off the freezer paper and heat set the paint, it looked like this.

Tuesday, April 13, 2010
Freezer paper stenciling, oh yeah!
I won't bother with any sort of tutorial because blogland is full of them - I googled it and got over 10 000 hits! It's really easy and heaps of fun. I plan to do a lot more of this.
After a couple of experiments I made pants for Nicholas. I wanted to photograph them flat on the floor to show the design, but as soon as he saw them Nicholas decided that he wanted to put them on. (He was really interested in the stenciled leg when it was on my desk). As it turned out, the resulting photo shows the design really well! So here is my first stenciled garment - footprint pants for Nicholas.
