Showing posts with label BWOF. Show all posts

Thursday, July 3, 2014

I made a dress. And undies.

I find the sewing mojo tends to desert me in winter, despite the fact that my sewing desk is in a lovely sunny corner of my house, flooded with sun and natural light and lovely to work at.  This winter is no exception, and I have a pile of projects in various stages of completion - some just vague plans, some concrete plans with pattern and fabric selected, some cut out, some partly sewn.  I find it best to just go with whatever project fires me at the time.

Which was this dress a week or so ago.  I'd seen it in the April Burda (style #106) and decided that I Must Have It.  I even had that issue out of the library before it hit the store shelves here, but didn't get around to tracing it because I didn't have fabric chosen.  Then when sorting my fabric stash I came across this one which fit the bill perfectly - very drapey, neutral colour. I bought the magazine on a Friday and finished the dress Monday night, leap-frogging SEVERAL other already started projects. Typical.


The front collar thing drapes really nicely, but I did end up hand sewing it from the point to where it is joined a bit further up the neckline. It flopped just a bit more than I liked. Next time I make this (I feel a shorter version coming on, to wear with jeans) I'll just sew it in all along the neckline seam.

It is a bit wrinkly from wearing, which I didn't notice till I looked at these pics, and rushing to get in front of the camera after pressing the timer button means that I didn't get the collar to sit perfectly either, oops. I love the shapely little cap sleeves.

I made a straight unaltered size 36, which with the benefit of hindsight would be perfect if I wanted to wear it like this, but it is winter here, and COLD. So I wear it with my cosy warm tech merino under it, bulking things up a bit.  For work I wear it with this mid-weight cardy over the top, leggings and my beloved pink boots.  I love that this colour was introduced by work because it matches them perfectly!


I feel I should apologise for the pretty uninspiring photos here. Today is my day off and quite frankly I've been that busy lately that the thought of brushing my hair, let alone styling it nicely, or in any other way making an effort was just Too Much. I figured I'd snap these and at least get it posted.  Maybe next time I wear it to work I'll take some better ones - better yet, get David to take them because he makes me smile. I feel like an idiot smiling at a camera on a tripod so tend to look a bit dour.

My other quick project was these - the Rosy Ladyshorts from Cloth Habit.


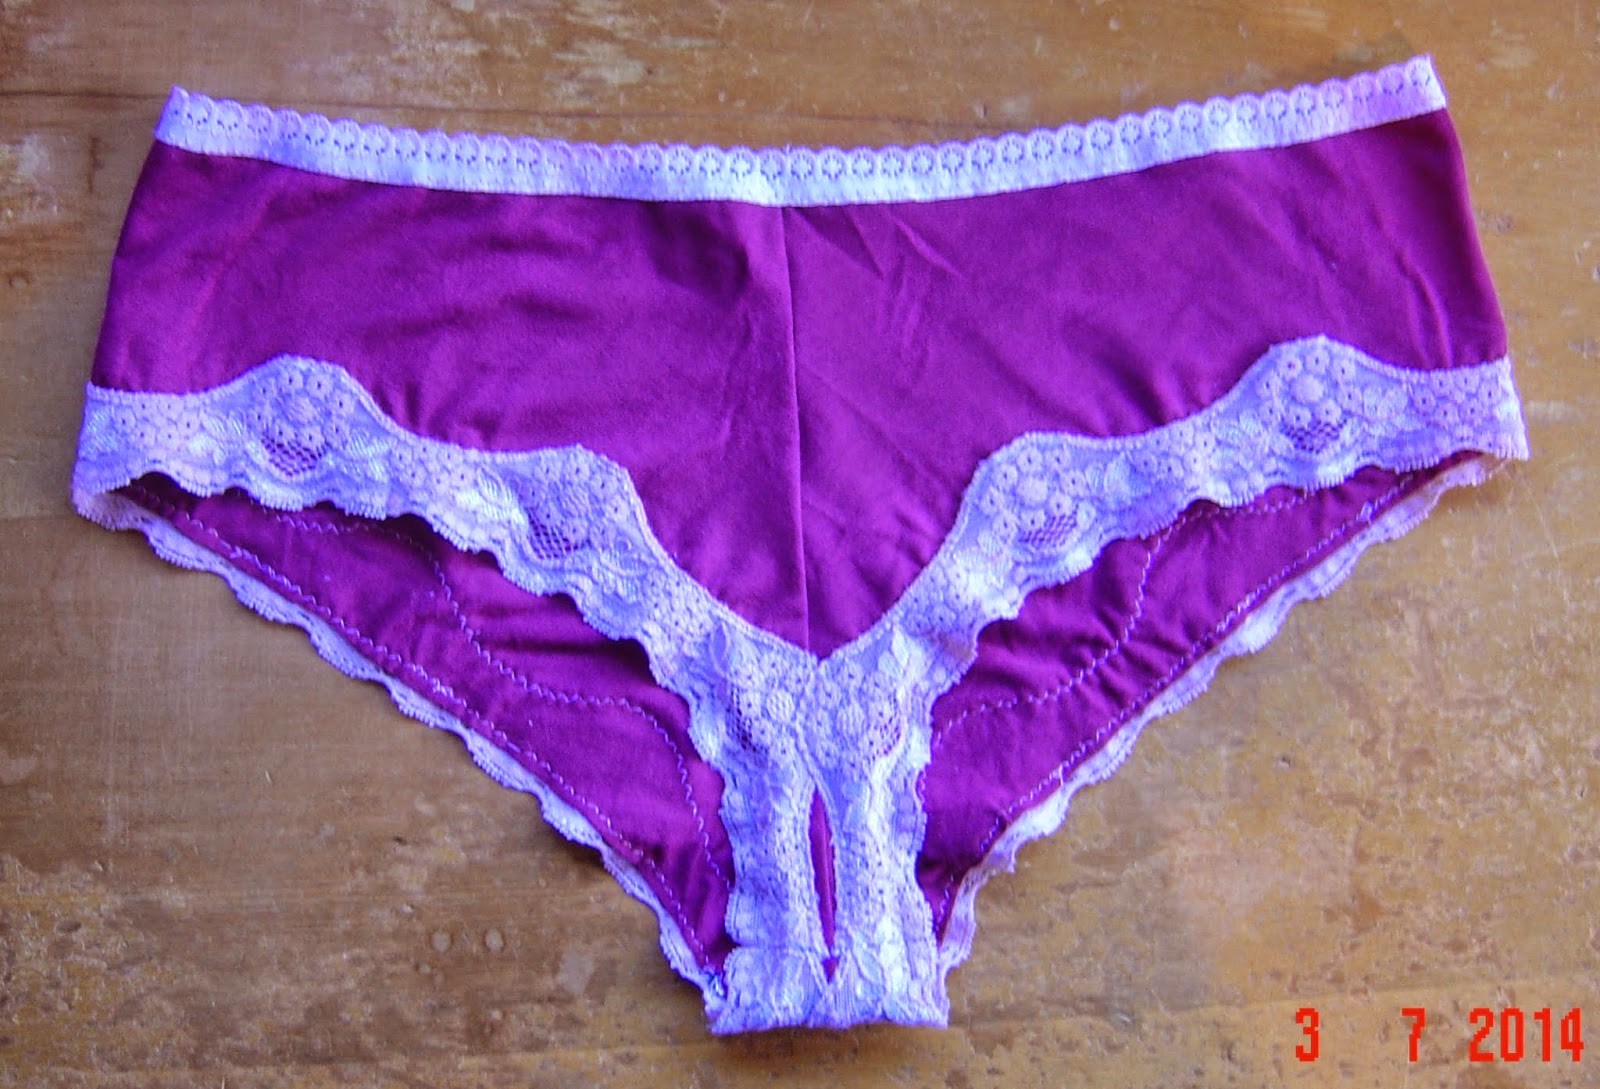
I haven't made myself undies for over 20 years, but find as I get older I'm getting fussier about how I like them to fit, so thought I'd give this pattern a go. The fabric is an offcut from a drapey cardy I altered for one of my craft group friends. It needed the droopy front point reduced, and what I cut off was big enough to trial these undies. I made them exactly according to instructions and I like how they turned out.  I haven't worn them yet since I only made them yesterday evening and wanted to photograph them before wearing, so I'll report later on how they are!

Wednesday, February 20, 2013

Trench coat from stash

I needed a new lightweight coat.  I'm going to Wellington for a few days with one of my sisters next month to visit family. (That reunion at Christmas has sparked a few more!) My other light coats are getting a bit tired, and while still serviceable, not nice enough for a trip away - you know how it is!

In the interest of having as much spending money as possible while away (ie, some) I figured I'd see what I could do using only stuff I had on hand.

As it turned out, without buying a single thing, I could do this.


The pattern is from one of my back collection of Burda magazines, 03/09 #119, with the pockets from #115 from the same issue. Everything I used to make this I already had - pattern, fabric, lining, bias binding (on the bottom of the lining), interfacing, thread, sleeve belt buckles.  The tiny lining inside is from leftover scraps from the wool/cashmere coat I made several years ago, so I give myself a bonus stashbusting point for that!  There are no buttons.  I didn't have any, so for now I'll wear it belted or open, and will add buttons when I get around to it.  (Although I did put a nice keyhole buttonhole onto the gun flap, just because I like how it looks. And it was a chance to use my beloved Greist buttonholer.)

Here's the inside.  I like the tiny partial lining.


The only problem I had was with my first attempt at binding.  I cut strips from fabric left over from a pair of rather funky pants I'd made for David once upon a time, and I could NOT get my machine to stitch on it no matter what I did.  It kept skipping stitches despite trying every type of needle I could think of (leather, stretch, regular [several weights], jeans, microtex,).  A walking foot didn't help, and neither did my usual fall back of stitching through paper.  Given that I had successfully topstitched the pants for David, that drove me NUTS! (Click on the pic for a bigger, clearer view)


So I ended up with this, and a massive dose of frustration.  


The fabric I ended up choosing for binding is a regular woven, and behaved perfectly.  I'd still like to have had that silver though.


Meanwhile my Alabama Chanin skirt is now being seamed!  All six panels have been stitched and snipped and I just have to join them together, add a waistband and rosebud stitch the hem.  Just in time for my trip.
( I was working on it on holiday, so my cousins want to see it done now!)


And because I MUST have the next Alabama Chanin project lined up for when one is finished, I have stenciled the pieces for another tank dress.  This is the Abbie's Flower stencil, fattened up a bit.  Um, yeah, stitching these is going to take a while.  I'm not snipping out the interior of the shapes, or beading on this dress, so it'll be a bit more wearable for every day.


OK girls, can we all guess what project is coming to every craft night for the next year?

Wednesday, December 5, 2012

The least alike twins in the world

 I made this dress for Isabella. (BWOF 01/09, #136b) It's one I threw aside in disgust a little while ago when I realised that as drafted it wouldn't go over her head.  Thanks Burda. I ended up drafting the original strap arrangement into actual straps that cross over at the back.  Fortunately I had plenty of fabric to cut them.


I made her a size 110.  She's recently been measured at 108cm tall, and as you can see, this barely hits her knee!  She is in the 75th percentile for height, and about 90th for weight, so sewing for her requires a little thought in the exact opposite direction from Nicholas!

Red and white gingham, fresh and pretty, and festive to boot.  She put the santa hat on, and willingly did a little dance for me to photograph.


I should have shown a picture of them together to really show the size disparity, but anyway here's Nicholas, also today.  Cute outfit isn't it?  His shorts are size 3-6months baby jeans, (bought for 50c from the kindy fair - bargain!) and his T shirt is a size 1.


Their personalities are also as different as can be. When I first found out I was having fraternal twins I thought it would be nice if they were different sexes so that they didn't necessarily go through their whole lives identified as "the twins" if they didn't want to.  I sure got what I wished for :-)

Wednesday, October 24, 2012

An Embarrassment of WIPs

That should be a collective noun.  I recently made a dress for my friend J, and while she was visiting for "fittings" (which involved a fair bit of coffee drinking and Pinterest surfing as well as actual fitting) she mentioned wanting a jacket.  So I showed her a pattern I thought she'd like (#118 from BWOF 06/06, which is old enough that it no longer appears in the magazine archive) and shamefacedly confessed that I'd started it (in fabric she'd like) when the magazine came out.  I think I abandoned it because I wasn't sure about trim, but it may have been because I realised that the sew-in interfacing I'd chosen to underline it with was the wrong choice.  This is a light, loosely woven fabric which frays when you look at it.  A fusible knit interfacing would have been much better. So I did more work on it anyway before reaching the same trim dilemma, and I am seriously contemplating carefully unpicking everything and using fusible interfacing to underline.

Moving on, at the same time I dug out the jacket I came across the cut out pieces of this handbag.  (It's the Nairobi bag which was a free download from Hotpatterns several years ago).  My current handbag is from the same pattern and is looking pretty sad.  So (also an embarrassingly long time ago) I cut this one from curtain fabric.  It stalled because I needed to get appropriate interfacing.  This is J's and my signature favourite colour, and she LOVES butterflies, so this languishing in a box almost brought her to violence!

And of course the ongoing Alabama Chanin skirt.  Mostly getting worked on at craft nights.


This is a dress I started for Isabella.  Also a BWOF pattern (#136B from 01/09).  I bought this magazine when she was less than a year old and had to wait for her to grow into it.  And then another year or so to get around to it.  I finally started a couple of weeks ago and when I got to this point I thought I should check the (suspiciously small looking) neck opening would fit over her head.
We know where this is headed, don't we?  Not even close.  Opening was about 48cm, her head was about 54cm.  Dress tossed aside in disgust as I ponder how best to make the opening big enough without losing the look of the back section, which I like.  Fortunately I have plenty of fabric to recut any of the pieces I need.


And last but by no means least (is anyone still reading?) the current genuine Work In Progress.  It's been waiting a few weeks because I needed plenty of space for the pieces.  Two of them, which each take up most of my dining table. (My sewing for me time has been severely curtailed of late by curtains, school holidays and the mammoth task of relocating all the kids to different bedrooms)

Any guesses as to what this might be?  I LOVE patterns which are impossible to figure out at a glance!  This is going to be a dress.  This dress:

Back
It's one of ten patterns in this book "Home Sewn", which is a celebration of the history of home sewing in New Zealand.  It gives a brief history of the subject, and the patterns, along with a short interview with each designer.  It appeals to me on so many levels!  One of which is as a future historical reference.  It's a snapshot of now, albeit brief, and it is specifically about New Zealand - YAY for local history!  The book is for sale at Papercut Patterns. I got mine from Global Fabrics in Dunedin.

This dress (the first of at least three projects I am planning to make) is by Cybele Wirren.  (See her website here).  I'm going to make a wide obi or corset style belt to wear with it.  One side the same fabric as the dress, the other something funky.

The patterns are really interesting - as far as I can tell, they are more like industry style patterns, with varying seam allowances, and notches marking them.  They're all printed on large pattern sheets, like magazine patterns, with each design in a different colour.  My only quibble is that the two pattern pieces for this dress are very similar, and were printed so close to on top of each other that I had to check several times that I didn't mix them up.  Minor quibble!  Instructions are concise and clear, but brief.  This is all you get, so not for beginners.  Hugely fascinating for those with a little experience!


So there you go, yet another blog post proving that I have a short attention span and a constant need to get on with the next thing, sometimes well before finishing the last thing.  Oh yes, and I've also decided that it's time I made myself a corset, you know, because.  I have Norah Waugh's Corsets and Crinolines out of the library and my pattern from it enlarged and ready to start playing with.  I got spiral steel boning from the States *ahem* several years ago.

Thursday, June 7, 2012

Winter project

In case anyone hasn't noticed, I have a bit of a thing (and by "thing' I mean "obsessive passion") for all things Alabama Chanin.  Next up, a dress, namely the tank dress from Alabama Studio Style.  My birthday is four months away.  Can I finish it by then?


To stencil on the design, (paisley, downloadable from here) I wanted a plastic stencil rather than freezer paper, which works brilliantly, but takes ages to paint with a brush.  My friend M, who works in a large stationery shop suggested laminater plastic - run the laminater empty to get a sheet of plastic.  Brilliant!  The only problem was that it rolled up and had to be carefully ironed (under a sheet) to flatten out.  It wrinkled a bit but worked perfectly as a stencil. M also loaned me quilt basting spray which I applied to the back of the stencil before using it.  That helped stick the stencil to the fabric just a bit which worked really well!  M even helped with paint mixing by giving me a colour mixing chart for polymer clay, which was a good place to start when working out proportions of paint to mix to get the blue grey I was after. Thanks M :-)

This was my first go at stencilling with this type of stencil and applying paint with a sponge.  I'm sold - the whole dress took less than two hours (would have been quicker if I'd known what I was doing when I started), compared to three and a half to paint the fingerless gloves in my last post!


The silver grey bead necklace was an $8 bargain from Diva - miles of beads!  The small packets are Maria George brand beads (on clearance at Spotlight) in a perfect colour for my fabric. I have six packets.  Might have to try and get more.  I'm thinking of filling the snipped out bead edged shape with silver grey beads (the backing fabric is pale grey).  There won't be many beaded shapes per panel so a bit of OTT beading here and there shouldn't be too much...


And since there was a lot of fabric left over from cutting out the dress and paint from stencilling it I figured I should make use of both while I had the table set up.  Fabric colours reversed for a skirt.  Another bargain necklace from Diva ($9 this time) to work with.  I won't get to this one for a while but it is a really nice feeling to know it's waiting for me.


Parting shot - proof that I do use my sewing machine.  BWOF 02/09 #129. This is for J to wear on her trip to Auckland to see Lady Gaga on Sunday.  Now you couldn't pay me enough to attend that concert but I do recognize the need for a new top for the trip!


Not pictured is the wool coat I will be making for Keely and the slipcovers I am making for my parents, all on hold till Nicholas is no longer contagious with the chicken pox which have kept him home from Kindy for a-w-h-o-l-e-w-e-e-k.  (Can't cut out on the floor when the teeth-grittingly perky "sick" four year old has covered it with duplo or trains.)  Being so young he is hardly bothered by the chicken pox so I'm really hoping he has infected Isabella and she can get it out of the way with little inconvenience to her.  At this rate it looks like she'll get it from Nicholas instead of one of the myriad of kindy kids who've had it!  Which means that he'll go back to kindy just in time for her to be home for a week or so.....

Monday, May 14, 2012

From very slow top to fast dress.

After rather a lot of slow sewing the speed of this dress from purchase of magazine to finished garment was, um, a bit of a contrast.


I bought the magazine (Burda 03/12) on Thursday and finished sewing the dress on Sunday.  The only reason it took that long was because I had to wait till Saturday to get to Spotlight for thread and a zip. (Btw, I'm wearing a black cardigan over it today which goes better with the black tights than the pale green merino thermal on it's own - only took the cardy off for the photo!)

For the record, it's #108 from that issue, and I have been itching to get my hands on it since I saw it online three months ago (that's how long it takes for the issues to arrive in New Zealand).  It's a size 76, which is the tall size 38.  Normally I would probably have to do the petite alteration to bring the bodice length back to regular, but this dress has a raised waistline anyway so I figured that if I didn't do anything it'd be fine.  There was a risk of the front being too low (always a risk with Burda anyway!) but I intend to layer it most of the time anyway, and if I wear it without anything under it I will just pin it closed.

I made no alterations to the fit, but I raised the armholes 1.5cm after comparing the pattern to a size 38 sleeveless dress pattern.  It would have been fine to leave them, but I hate low armholes.  I also brought in the neck by 2cm as I wanted wider straps.  Wider straps meant that I could sew the back and fronts together at the shoulders and join with their facings and then pull the fronts right side out through the shoulders to have a cleaner finish than the pattern directions would have produced.

The fabric has narrow stripes of elastane woven in which makes it crinkle up.  I pressed most of the crinkle out before I made the dress, and I'm interested to see what happens during wear.  I'm not sure to what extent it will crinkle up and hence shorten.  On a taller woman this is supposed to hit at around knee length.  On me (5'6") it's just below, so I hope it doesn't get much shorter!  I also omitted lining and interfacing to keep it as soft and drapey as possible.  The front neckline is cut almost on the lengthwise grain to make it as stable as possible without tape stays or anything else needed.

So, there you have it - a new dress in double quick time.  There are at lest two more patterns from this issue which I NEED to make, and I want this dress again too....

Monday, December 12, 2011

New dress for MEEEEE!!!!!

When people know that you sew, they give you stuff. The fabric for this dress came from my very lovely Mother In Law (and I'm not just sucking up because I'm going to tell her about this post - she really is fantastic!). She had been given it to find it and some of it's mates a good home. And I took one look at this (70's ?) scenery print on something completely devoid of natural fibre and it screamed MAKE ME INTO BURDA 10/09 #119! (Many many thanks to Sewingelle for pointing out the Burda archives!). So I did.

My trusty assistant overseeing proceedings.


I am really pleased with how this turned out, with the possible exception of where the pleats are released. The fabric is very thin and both it's lack of body and tendency to be see through led me to underline it (in the ubiquitous red lining - the dress looks gold when light shines through it!) and while that is perfect for the rest of the dress it makes the area below the pleats a bit poofy. I am trying to decide whether or not I care. Edgestitching the pleats would flatten them, but I don't want to do that. I also don't want to sharply press them, so I'm wearing it today to see what I think. So far, not bothered.

In addition to underlining it I added 4cm to the length (I hate my knees) and scooped out a chunk of neckline as I'm not a fan of a high neckline on myself. Other than that, straight from the pattern.

So once again a project which wasn't even on the horizon a short time ago is made and being worn. I suspect I have sewing ADD.

Saturday, June 18, 2011

Pretty dress for someone else

I love making pretty dresses for other people. I like making pretty dresses, but there is very little call for a formal, strapless, ruched chiffon bodiced dress when dealing daily with two three year olds, so I don't make many for myself, funnily enough. (Not that I've ever worn a strapless dress myself anyway). Fortunately every so often I get a call from someone who was given my name by a friend for whom I made something once, and I get to make something pretty.

Note to self: Don't try to photograph flowy skirted dresses outside if there is even a breath of wind. It doesn't look blown about, but the skirt is wonky in this shot compared to the last one, and this was the best one!
I was going to document the construction a bit more thoroughly, but the teenager borrowed the camera batteries, the 11 year old had flattened the batteries first, and I just ran out of oomph on that idea, and much of it was sewn in the evenings when photography is difficult anyway so these two are all I have.

Bodice with ruched overlayer:
With empire band:
The dress has a separate boned corsolette with waist stay, and the dress itself is only joined at the top edge. I love this technique for strapless dresses - they STAY PUT and hang smoothly. This dress is the for teenage daughter of a teacher from Oliver's school (who was given my name by the secretary who was given it by one of the kids' teachers) for her school formal. She brought me a picture and I modified a Burda magazine pattern which is how I create almost all patterns for adults. So much easier than drafting from scratch!

Now back to the mischief of mice. (Apparently the collective nouns "horde" and "nest" are also applicable, but with a son like Nicholas "mischief" seems eminently more appropriate!

Monday, February 28, 2011

Stuff I should wear more often

Like so many others I want to mention the Christchurch earthquake. We live about 300km south of Christchurch, and I have visited it many, many times - the last being two weeks after the September earthquake. I have nothing to say that has not been said infinitely better by others, but want to add my most heartfelt "Thanks, World" to the hundreds and hundreds of rescue workers from all over the world helping in the grimmest of tasks. David and I both have relatives in Christchurch, all of whom are ok. Facebook finally gets useful!


It certainly put my pouty whining about waiting for patterns into proper perspective. (They have been given up for lost, and immediately resent.)


I've almost finished the new Alabama Corset - stitching on the binding, then stitching around the hem. A day or two and it'll be done. (Depending entirely on how much Mad Men I get to watch). I have finished the navy blue dress for Isabella from my last post. Turns out I had a pile of piping cord tucked in another box marked "notions". I would photograph it today, but it is YET ANOTHER grey and dreary day. So our cr*p summer limps to an end. It hasn't been particularly cold, but it sure does seem to have been grey and damp.

So anyway, I decided that I am sick of the way I dress. (Again. This happens about once a week.) This time triggered by a really well presented Mum at Kindy. It got me thinking that I could do better. So I went digging in my drawers and found these pants. (I made them in a stone colour as well.)


They're from a 2003 Burda magazine, #137 from 09/03, to be exact, and are now a smidge too small, (made in the days when I was prepared to be disciplined enough to keep my weight under the recommended BMI.) but still wearable, especially with this loose tunic style shirt, also a Burda mag pattern, but I can't be bothered hunting out the details right now. I will if anyone wants to know. If I were less vain I'd show you a proper shot of the front, showing the angled zip, or of the back, showing the angled CB seam, but I couldn't bring myself to publish those! Looking at these pics makes me realise that the details are really hard to make out. The pattern pieces are really interesting, so when I get a chance I'll scan the line drawing and pattern overview to show them better - I love this sort of project!

Tuesday, March 30, 2010

Dear Mary Nanna

Reading the comment you left on my last post, I think I know the pants you mean. I haven't worn them for ages! I'd almost forgotten them, which is sad because I really like them. I made the top that goes with them too. And here it is:


Finding the exact pattern details for this would entail me moving a bunch of stuff off the chest my Burdas are kept in, so might have to wait till I can be bothered or someone asks ;-)

I was blog surfing a week or so ago and came across a reference to the free Alexander McQueen jacket pattern download. I made that a while ago too! I thought I might post a pic of it now, and have a rummage through my wardrobe for some of the more interesting or unusual things I've made to show as well. Anyone interested in a bit of show and tell?

Editted to add - I couldn't help myself, and had to go and find the exact pattern details. I'm pretty sure I found the right mag (how many designs have "galloons" I wonder?!) and it's actually Sept '03, #137 for the pants, and #136 for the top above. Now I want to make that top again.....

Wednesday, September 9, 2009

Finished party dress, and MY dress

Here is J's finished dress on my dummy. She forgot to bring her undergarment when she picked it up, so I didn't see it on her. She did bring the belt and shoes she's going to wear with it. I love that red! It sits better on her than the dummy (as most things do), but you get the idea. I made red thread belt loops to hold the belt in place, so she can never wear it belt less now!


Gail asked why I didn't pin the neckline stay tape directly to the inside. Basically, because I am incredibly anal. (There's a reason I call my blog Everything Just Sew!) Bodies can be asymmetrical, and to ensure the neckline fits her properly I had to pin it from the right side. If I'd done it inside out there's a chance it would have sat differently if one shoulder was higher than the other, for example.

So after that was done, it was time for MY dress! I had no problem picking fabric and pattern from my collection. I got to it yesterday while the twins were asleep. I was planning to get as much done as possible, so needed fuel. I like this fuel. I chuck them all in a bowl so I never know what flavour I get till I eat it. (Entertainment as well as a snack!) Better not do it too often or I'll undo all the effort I've put in losing 10kg and my dress won't fit.


For my pattern I chose Vogue 2786, a vintage pattern I've had for a couple of years. I'm not keen on long dresses, so shortened it to about knee length. That also saved a LOT of fabric, since it's cut on the bias. I've had these two printed stretch satins for a couple of years as well. I love that one is a negative image of the other. I figured that would highlight the gathered section without being too big a contrast.
I'd traced it a couple of years ago to make in a cotton, but the fabric turned out to be elasticated and pulled into a wide seersucker effect when I prewashed it. Totally inappropriate for this dress, so the pattern sat forlornly waiting for the right fabric. A quick measure showed that while most of me is back at pre-baby size, my bust is still at production volume and I needed a bit more room there! The easiest way to get it was simply to add a bit extra at CF and CB and figure it out with fitting.
Here's one of the gathered insets sewn to it's stay. It's a bit hard to see, but the corners curl up because the stay is a very tight fit. This should make the inset sit nice and snug against my body, which will make the gathers sit in tightish folds - there's nothing worse than floppy gathers sitting around your middle!


And here's one completed half pinned to the dummy. I've done both halves, and hope during today's nap to get them joined together. The pattern has you do a hand rolled hem at the edges, but I don't fancy that - too wimpy for armholes and neckline for my taste. I'm going to use narrow strips of self fabric as facings instead. They also use a conventional zip, which I've ditched in favour of an invisible one, and I raised the back. Several months at the gym mean I could wear a low back with confidence, but no amount of work at the gym is going to render my front capable of going without a bra and I don't fit my low backed one at the moment! I'm really not looking forward to hemming this. Bias cut stretch charmeuse. Oh yay.


Friday, September 4, 2009

Party dress progress

After the boat cover, it was quite a change to work on a dress! Since it's a one shouldered style I decided to stay the neckline with twill tape. In order to do that I had J try on the dress, right way out, and pinned the tape along the neckline on the right side, snugging the bodice to her body where needed.
Then of course I had to move it to the inside without losing the dimensions. That was easily accomplished by marking tape and dress at several points with pairs of pins before moving the tape to the inside.
After moving the tape to the inside, I sewed it in, easing the excess as I went. I used a LOT of pins to make it even.

Since gettng to this point I've sewn in the lining (I wish I'd photographed that, since it was an interesting exercise getting it in and understitched to neckline and armhole.)
And for no useful reason, here's a gratuitous skitey photo of me sitting on Dad's boat earlier today. I went out there so we could have a photoshoot of the cover totally finished. The weather was beautiful, which never hurts. This shot just shows how the sides can be rolled up so you can fish even if it's raining. (Dad has such a tough life!)
Hmm, from this angle my legs look about three inches long.


Wednesday, August 19, 2009

Party dress, but not for me

A friend is having a birthday with a zero in it, which naturally requires a new dress. She chose this dress from one of my Burda WOFs, without the huge shoulder ruffle and with a reduced skirt. Her measurements are very close to a Burda 42, so I cut a muslin to that size and fitted it to my dummy with the expectation that it'll need tweaking.

I was interested to see where the princess seams are placed. They're a long way towards the sides, and the front ones don't go over the bust at all. I'm really keen to see how they sit on an actual body.
The dress itself is to be a vibrant purple colour, and I'm looking forward to making it. It may not be for me, but at least it's a proper detailed project! Underlining, actual lining, invisible zip, well stabilized neckline, hand hemming....... How geeky is it that I am salivating over the tricky bits?

Friday, July 17, 2009

Some of what I've been up to

Woohoo! New hard drive! I got the camera software installed PDQ so I could put photos onto the computer and edit them. Here's a selection of what I got up to while I was not blogging.

This is Jalie 2682 , which I made for myself a couple of years ago in the sleeveless version. I always planned to make it for Georgia and finally got around to it a few days ago. I loved that we could decide at lunch time that I'd make if for her, and even including tracing her size it was done by 3pm! And I had to feed and change the twins in that time as well! I love the shape of this, especially the neck. Nice and warm for a winter T shirt. She loves it. I'm annoyed that I wasn't paying attention to lining up the print when I cut it out - doh!

This will be revisited a number of times for both of us and Isabella I suspect!

This is the best of a number of truly horrible photos of my new trousers. (Tip - never let a distracted nine year old be your photographer. Wait for your husband, who will at least get you in focus!) They're #101 from BWOF 05/09. I cut a size 42, but ended up taking them in enough that they're probably more like a 40. I also adjusted the legs by taking them in a little at the knee, then cutting straight to the hems to reduce the width of the lower legs. The magazine made them in satin, but in my heavy denim that was going to be too full. I should have shortened the front crotch length, but when I muslined them they were ok. If I'd sewn in a zip instead of holding them closed I'd have had a better idea though! However, I never ever wear tops tucked in, so it's not a big deal. The muffin I'm sporting in this pic is due to my top, (another Ottobre nursing top) not my actual muffin, which I'm happy to report is now 7kg smaller than it was a couple of months ago. Still no comment from the husband.


And this is V1061, the Sandra Betzina wrap top. It's quite a dark colour, so hard to photograph. this is the best I could get. Here's the front. On me it sits more snugly to my front.

And the back. The hood looks good, but in this rather slippery fabric it's inclined to slip down to cover my shoulders a bit. If it annoys me I'll take it off. You can't see the panel seams very well unfortunately. On me it sits a bit loosely at the back. I'm not sure if I was off in my seaming, or whether I should have gone down a size. I absolutely definitely need to adjust the bust point for my next version of this - no Wonderbra in the world can hoick my bustline up THAT high!

When I put my photos on my computer I realised that the ones I'd taken of a Jalie sweatshirt
I made for Georgia were no good because I took them in the conservatory with sun and shade obscuring a lot of the details. I'll have to try again.
I've also been working on the design for the baby coat from my last post, and have a store in town willing to look at what I make with a view to stocking it! No promises, but I'm dead keen to produce something saleable now and see what they think. Fingers crossed.